News
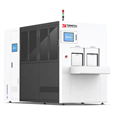
How to Achieve Precise and Efficient Wafer Thinning on the Backside Thinning Machine
2026-02-19656

The core criteria for precise and efficient wafer thinning on the Backside Thinning Machine are thickness control accuracy ±1–2 μm, TTV (Total Thickness Variation) ≤2 μm, and no defects such as edge chipping, micro-cracks, or surface scratches. This relies on the systematic coordination of wafer pre-treatment, equipment and consumable matching, precise process control, and full-process quality monitoring. The key is to balance material removal efficiency and wafer processing integrity.
  1. Prerequisites: Pre-treatment and Equipment-Consumable Matching
    Wafer pre-treatment must ensure qualified initial flatness, no impurities or oxide layers on the backside, and completed frontside protection (coated with high-adhesion UV tape/blue tape) to avoid frontside pattern damage during processing.
    Equipment calibration: spindle radial runout ≤0.5 μm, feed mechanism positioning accuracy ≤0.1 μm.
    Consumables must be matched step-by-step: rough grinding uses 1000–2000# diamond grinding wheels, fine grinding switches to 3000–8000# resin-bonded grinding wheels. Cross-contamination of different grit grinding swarf is strictly prohibited. The cooling system must be pre-adjusted to ensure stable flow at 10–15 L/min.
  2. Core Process: Precise Control of Staged Grinding
  1. Rough grinding: aimed at efficient removal of excess material. Spindle speed 15000–25000 rpm, grinding pressure 0.3–0.5 MPa, feed rate 200–300 μm/min. The wafer thickness is quickly reduced to target value +20–30 μm via rigid grinding.
  2. Fine grinding: core to ensure accuracy and surface quality. Speed increased to 25000–30000 rpm, pressure reduced to 0.1–0.2 MPa, feed rate 50–100 μm/min. Micro-cutting corrects thickness deviation and reduces surface roughness to Ra ≤50 nm.
  1. Quality Control: Defect Prevention and Dual Inspection

    Full-process control: workshop cleanliness ≥ Class 100 to prevent dust scratches; real-time temperature ≤40 ℃ to avoid micro-cracks caused by thermal stress.
    Defect treatment: reduce grinding pressure and check wheel flatness for edge chipping; compensate feed via online detection for thickness deviation.
    Dual inspection: laser thickness gauge for multi-point thickness and TTV measurement, microscope for surface defects, to meet packaging requirements.
  2. 发1-1.png

Contact Us
Contact person: Grace
Phone: +86 13622378685
Email: Grace@lapping-machine.com
Address:Building 34, Zone B, Yuanshan Industrial Zone, Xiangcheng Road, Guangming District, Shenzhen,China

Scan WeChat

Shenzhen Tengyu Grinding Technology Co., Ltd.